Wednesday, 16 July 2008

Scrappingchix

Another good friend of mine just launched a scrapbooking online shop. It's called Scrappingchix and was officially launched on the 12th July. You can visit the online shop at www.scrapping-chix.com and read up on what's new on the blog scrappingchix.blogspot.com.

For the opening day, I made a canvas for her. I'm very glad that she loves it because let me tell you.. staping on a canvas is not a fun thing.. hehee. But I managed. I used a lot of paint, embossing and Perfect Pearls. Very happy with the result.

Host unlimited photos at slide.com for FREE!

Host unlimited photos at slide.com for FREE!

Host unlimited photos at slide.com for FREE!

Host unlimited photos at slide.com for FREE!

Host unlimited photos at slide.com for FREE!

Host unlimited photos at slide.com for FREE!


An Altered Wodden Box

Came back from one of my many trips to KL recently with a tub of texture paste. I have been reading how great this medium is and have wanted to try. A quick search in Nadiah's toy boxes and I found a perfect wooden box which is perfect for altering.

Host unlimited photos at slide.com for FREE!

Host unlimited photos at slide.com for FREE!

Host unlimited photos at slide.com for FREE!

Host unlimited photos at slide.com for FREE!

Host unlimited photos at slide.com for FREE!

Host unlimited photos at slide.com for FREE!

I'm very happy with the end result of this box. I managed to get that old, antiquey look that I love. It's quite easy to make this but time consuming, what with waiting for things to dry, which I'm so not good at!!

Ok, so this is what I've done:
First I painted the box with dark gold acrylic paint. Just lightly on the edges. The I mod podged the patterned papers on the sides and top of the box. Because I cut the papers slightly shorter, the gold paint can be seen of the edges. Make sure you seal the edges of the papers with mod podge once they are dry.

Then drop a little glob of gesso on the surface and using a thin piece of chipboard (or an old credit card would suffice) and spread the gesso lightly this way and that. Very roughly and thin so that you can still see the printed paper but at the same time it gives the antique look.

Once that's dried, distress the surface with a distressed ink pad or paint lightly. Leave it to dry.

To make the alphabets on the side, you would need some texture paste, a stencil and a spreading tool (I just use those popsicle stick you usually get in a packet of rub ons).
Place the stencil on the side surface. Secure with masking tape if you don't want it to move about. Scoop some texture paste and spread over the stencil, making sure you fill it up. Use the spreading tool to move the paste about. Somewhat like spreading icing on a cake. One you're sure the stencil is filled, scrape the excess paste and gently lift up the stencil. Make sure it's completely dried and harden before doing the same on the other side. This is the part that I'm bad at... waiting for it to dry. I left it overnight to be on the safe side.

Once the alphas are dried and harden, paint it any way you like. I used Ranger's Perfect Pearls to get that pearly, shimmery look. I love Perfect Pearls. The result is so beautiful. For a more intense look, I mix the pearls with a little water. When dried, just brush dry powder of another colour lightly over it.

Lastly, embellish the box any way you want. I used American Craft Chipboard Thickers for the word NOTES and lightly sand to distress the letters.

Thanks for dropping by and hope the tips and techniques helps. Give it a try and leave a comment for a link. I would love to see what everyone comes up with.

Baby Boy Album

Another gift made for my cousin you just had a baby boy. Hope she likes it.

Host unlimited photos at slide.com for FREE!

Host unlimited photos at slide.com for FREE!

Host unlimited photos at slide.com for FREE!

Host unlimited photos at slide.com for FREE!

Host unlimited photos at slide.com for FREE!

Host unlimited photos at slide.com for FREE!

Host unlimited photos at slide.com for FREE!

Host unlimited photos at slide.com for FREE!

Silvia

Silvia is one of my oldest friends. We've known each other since we were both 12 years old when we both took part in the penpal program and from there had started to write to each other. Although it's been 20 years, Silvia and I have never met. She is in Italy and I am here in Malaysia and never has our path crossed. It came very close when I was studying in England, but somehow rather we never did.

This year, for her birthday, I made a 4x4 canvas for her. I hope she likes it.

Host unlimited photos at slide.com for FREE!

Host unlimited photos at slide.com for FREE!

Why I Scrap

A good friend of mine started a new blog last month with the sole aim of promoting the art of scrapbooking in Malaysia. I think this is a wonderful step towards giving all scrapbookers a place for getting together exchanging ideas and inspiring each other. You can visit the blog at Scrapping Inspirations.

Recently SI launched a Circle Journal on Why I Scrap and I contributed a layout. You can read up more about circle journaling here and if you would like to take part, please email Chowchow at chowchow138@gmail.com.

Host unlimited photos at slide.com for FREE!

Host unlimited photos at slide.com for FREE!

Host unlimited photos at slide.com for FREE!

Host unlimited photos at slide.com for FREE!

Paint Your World With Colours CD Mini Album

I took part in a Rainbow Swap in Scrap-n-Crop Forum, which was hosted by Jessy. Each of us were to assemble a kit consist of materials of the colours of rainbow. I received mine from Jessy herself, a colourful collection that also included a mini album made from old CDs.

I tried to use all of the items that I received but they were just too many and in the end I still had plenty of buttons and tags left.

Host unlimited photos at slide.com for FREE!

Host unlimited photos at slide.com for FREE!

Host unlimited photos at slide.com for FREE!

Host unlimited photos at slide.com for FREE!

Host unlimited photos at slide.com for FREE!

Each of the pages of the album, Jessy had stuck solid colour cardstock. I decided to either distressed, embossed or adhere paper cutouts to give them different looks and textures.

I used rub ons from Autumn Leaves, Fancy Pants Design, Daisy D's and 7Gypsies for the quotes (I LOVE quotes!!), Basic Grey alphabet stickers and Making Memories and American Craft paper cutouts. All the other materials are from Jessy.


Recent Layouts

It's been quite sometime since I last post anything. Been having internet connection problems and plus I seemed to have trouble uploading pictures into blogger the usual way.

Anyway, some of my latest work includes:

READING
A DT layout made for ScrappingGlitz. Papers and alphabet stickers come from GCD Studios. You can purchase them from the website.

Host unlimited photos at slide.com for FREE!


SIMPLE PLEASURES
A layout made for a challenge in the ScrappingGlitz Forum. We were to used certain materials to make a layout. Do visit the forum to take part in the challenges and online crops and sketches.

Host unlimited photos at slide.com for FREE!


BABY FAHIM
I made this for Ina, as part of the Scrap for Friends project in Lovescrap Forum. We exchange pictures and scrap for each other.

Host unlimited photos at slide.com for FREE!

Monday, 30 June 2008

Fav 5

Here's a layout for Scrap Inspire Create June challenge which is about things that you consider to be your faves, or favourite things of your kid/father/mother/partner, what is considered to be favourite, favourite people or animals,...etc. Things that make you happy when you're feeling sad...

I chose Nadiah's 5 favourite things (of course) at the moment. Things that go where she goes. They are:
1) a stuffed cat
2) a stuffed monkey which we bought at Zoo Negara recently
3) a handful of felt tipped pens of every colour which she collects two each week
4) a box of her favourite VCDs (which is heavy as hell!!)
5) a toy doctor's stethoscope (but looks like a real one)

Tuesday, 17 June 2008

Father's Love

Here's my first layout as a DT with ScrappingGlitz. It's a tribute to Father's Day. Most of the materials used are from Kaiser Craft: the papers, the wooden flourishes and the blings.


Tuesday, 10 June 2008

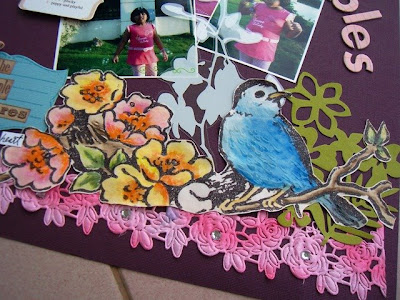
Blowing Bubbles

I didn't plan to make a layout today, let alone one made for a challenge. But I took one look at Iris' LO for June challenge in SnC Forum, and I literally ran to my scrap table to start a new page. I was so inspired!!

Her challenge was:
1. Incorporate at least one (art) medium you used as a child i.e. crayon, watercolor, pentel pens, etc.
2. Lay on the embellishments and goodies.. don't restrict yourself thinking about design principles, just have fun and use your stash!
3. Mix your papers - we sometimes get used to using papers from one collection/ manufacturer in our pages. But if we continue to do that we will end with lots of unused papers. So this month, let go of your fear of mismatching patterned papers. Just go with your instinct and create.

Here's my take:


Monday, 9 June 2008

Sneak Peak for ScrappingGlitz LO

Here's a sneak peak of my first DT LO for href="http://www.scrappingglitz.com">ScrappingGlitz which will be out on the 16th June when the online store will be officially open.

You

Another LO managed to finish today. I was determined to use my Fancy Pants Design felts that's been gathering dust.


My Little Picasso

I made this LO for a challenge in SnC hosted by Michelle. I love this one because the challenge was to scrap our little one's artistic side. I have been meaning to scrap Nadiah's many paintings and paper animal cutout for the longest time but have not had the time. Her 'art' is stacking in this file exclusively for her rainbows, ladybugs, butterflies, hand prints and all her other brilliant art.. hehee.

So here's the layout titled My Little Picasso.


LinkWithin

Related Posts with Thumbnails