Monday 31 December 2007

Baby Album

A cousin of mine had a baby girl recently. Rather that gifting her with the usual newborn hamper which consists of clothes and other baby products, I decided to make an album. Number one, it's personalised which she would not get anywhere else. And number two it's a good way of using my paper scraps. As this is to be for a baby GIRL, the theme colour is of course pink.


This is a post bound album. I've been studying my other albums and felt that it is doable. I used foam sheets to cover the spine, which I must say that it was a job well done. I'm so proud of myself. It looks so pretty that I almost kept the album for myself... hahaa, just kidding!!


A shaker box on the cover


Rub-ons on a strand of ribbon. Very nice effect!


My personalised stamp. I originally had it done for the ATC Swap. But decided to keep the title blank so that I could use it for other projects/gifts that I make. So if you get something made by me, you'll find this stamp somewhere on the item :D

Sunday 30 December 2007

My {Indian} Princess


This is a layout that I did using a kit supplied by Scrappingville. I must say that the items are all so lovely that I was so ecstatic I wanted to start right away. These are the items I received


The only thing I didn't think would go with everything else are the plastic flowers. All the others seems so like Laura Ashley kinda designs; you know very flowery, English country colours kinda designs. So I didn't use any of them. But I love, love, love that velvet ric rac.

Here I stamped a design on a notepad with watermark ink and colour the green and pink with chalk. I love this technique. Being able to mix colours in a stamped image.


The diecut flowers are great. The have extra petals for layering, which I used double sided foam tape to add dimension. But first I stamped the whole flower with watermark ink and sprinkled with clear embossing powder and heat. The result is an impressive glassy finished.


I also used clear embossing powder for the word "indian" which would make it stand out a little.


I haven't sewed a button on a layout in a while. Most times I just stick them with glue tape and I'm done. So thought I would sew 6 buttons here.


Lastly, thanks Michelle for recommending me to Scrappingville, and thanks Sharon for giving me this chance. Hope you like it.

H = Haircut


Made this layout yesterday. Actually, I scraplifted this from Scrapbook.com gallery. I just changed the colours and the details. I love this LO because it used a lot of flowers. I very seldom use that many flowers and thought it would be a good LO to do. I think I shall include this in Nadiah's A-Z album for H.

That's Nadiah's first haircut, by the way. That was in 2005 when she was three. She didn't make a fuss and I don't think she cared that much. She used to have long curly locks. But after the cut, her hair has gone straight... much like mine did when I was her age (so I was told).


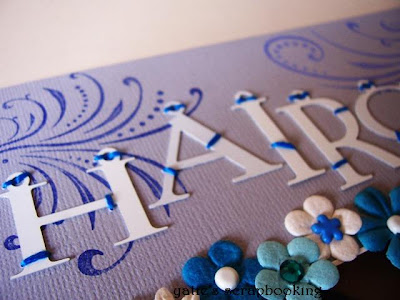
I used Making Memories Eyelet Alphabets which actually comes with brads. But I figured there would be just too many brads on the LO already with the flower centers. So decided to sew the letters instead.

Friday 28 December 2007

Brag Book - Accordion Tag Album

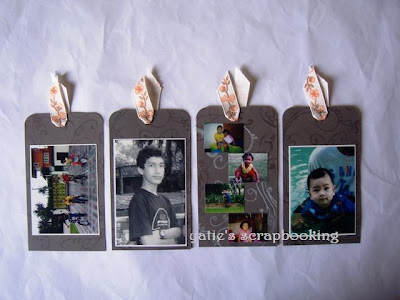
I made a brag book for my mom and called it Mak Tok's Brag Book. It's filled with lots and lots of pictures of her grandchildren. We all know how much grandmas like to brag to their friends about the grandchildren. Well, this time my mom can not only brag about them, but also show pictures of them. I hope she likes it.


I used a ribbon and connected the two ends with Queen&Co's Hook Ups - Hottie List and secured it with a snap button

Capture Life Create Art

I'm trying my hands at altering art. It's when you take something and alter it into a piece of art. I was browing through Scrapperlicious' blog one day and come upon an altered jigsaw puzzle. Click here to see her gorgeous work. I was so inspired and I decided to try my hand at it. So last night I cilok Nadiah's old puzzles and painted them with acrylic paint. I had started with a 4-piece puzzle but Nadiah happened to see me painting on her puzzles and decided to join in. So she got out a 6-piece one and wanted to paint on it too. We painted it with Making Memories Acrylic Paint - Razzleberry and left it to dry overnight.

This morning, I get Nadiah to stamp flowers using Making Memories Foam Stamps which I have not used in a long time.


Then we stuck some pictures of her and embellished with flowers, stickers, chipboards and brads. I remember Ali Edwards' favourite words which are "Capture life. Create art". I thought that the words were just right so I titled the piece just so and we were done.


These are the pictures of each piece


Monday 24 December 2007

A = Adore

I am making an A-Z album for Nadiah. I've actually been meaning to do this for a long time now, but could not decide what size the album should be. So now I am decided. The album would be 8x8. After all, it is the size that I'm most comfortable with. I think the first LO would be N for NADIAH which I have already done. You can go here to view the layout.

Today I finished "A" which is for "ADORE." As usual, I planned to do something and ended up with something else.. even using different paper. So here it is


I did a lot of cut-outs using my trusty old craft knife. I used to love doing that but with so many ready-made die cuts and stickers, I have been neglecting my craft knife. Here I cut out the leaves, the flowers and the word "adore".


I love this picture of Nadiah. It was purely an accident shot but it came out great. And the fact that I had printed it out in black and white enhances the whole layout.

Thursday 20 December 2007

Sarah Alya: A 4x4 Mini Album

I made a small chipboard album for my cousin's daughter, Sarah Alya. She is such a beautiful girl and photographs really well that it was a pleasure to make her this gift. It's a decorated double sided 4x4 chipboard squares connected by a strand of ribbon.


Here I made a shaker box using painted and stamped chipboard frame, some sequins and acetate sheet to cover on top.


Sunday 16 December 2007

Zoo Exploding Box

Yeay!! I'm so happy that I finally get to use the exploding box that I made a long time ago. It has been standing on the book shelf all this while. A good thing the shelf has glass door or dust would have gathered on the box... hehee!!

Anyway, our recent zoo trip produced many, many pictures and I decided to print most of them tiny sizes and they fit nicely in the box.

I got the instruction on how to make an exploding box from this link:
http://glitteradventure.blogspot.com/2006/11/exploding-box-class.html
The instruction is very easy to follow and there are photos too.


LinkWithin

Related Posts with Thumbnails